For a cross-reference to other naming schemes from Hoya, Schott.
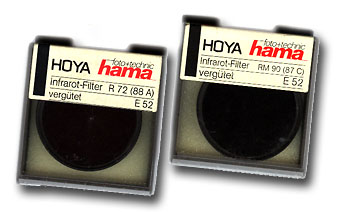
Note that the equivalent Wratten numbers that Hoya states for their
filters (see the boxes on the right) are not correct! The R72 is more
comparable to the #89B, and the RM90 is stronger than the #87C (somewhere
in-between the #87C and the #87B).
The ‘true’ infrared films – Kodak High Speed Infrared and Konica Infrared 750 – exhibit their
characteristics even when being exposed through a simple light red filter, such as #25. However,
pseudo-IR films, such as Ilford SFX 200, are quite disappointing with these filters. For them, at
least a #89B has to be used to produce a sufficient degree of the Wood effect. I'm very happy with
Hoya's R72. It works very well with all true as well as pseudo infrared films. See also my page A
Comparison of B/W Infrared Films for more details and examples.
Most ‘true’ infrared filters are quite expensive. Not only the ones made of coated glass, but
also the gelatins from Kodak. A cheaper alternative is the polyester #87 made by Lee, available in
75×75 mm and 100×100 mm. Another inexpensive alternative is the dark red gelatin filter from Brenner
in 80×80 mm. It's somewhere between a plain red and a true infrared filter as it's not opaque but
far too strong for standard b/w films such as T-MAX.
Look-Through vs. Opaque Filters
Using opaque filters together with SLR (Single Lens Reflex) cameras usually requires that you have
to compose your shot without the filter and then put the filter on before the exposure. This is a
procedure is very annoying especially for screw-in filters and only slightly less for slip-in
filters of the Cokin type. It becomes nearly impractical when fixing sheet filters with adhesive
tape behind the rear element of a lens, as often required for e.g. fisheye lenses or medium format
lenses with huge screw-in mounts. In practice, you'll need support of a tripod in all these cases –
and steady as well as very patient subjects, of course ;-)
Mounting the filter between the film rails (BTFR) circumvents this problem (see the section “Attaching
Filters” below).
The easiest solution however is to use a camera with a range- or
view-finder instead of a SLR. A favorite of mine is the 6×6 Yashica
Mat-124G with Konica Infrared 750 or MACO IR820c film and Hoya R72
filter. Even though these films have a very low effective sensitivity with
this filter (about 6-9 ASA), using a tripod is not absolutely mandatory in
bright sunlight. The smooth shutter of the TLR (Twin Lens Reflex)
Yashica makes it possible to hand-held longer exposure times than a SLR
with its mirror slap.
Finally, choosing a look-though filter such as the #25 or the filter
from Brenner avoids all this hassle. However, the infrared effect will not
be as strong as with the opaque filters. But this is more an issue with
the pseudo infrared films. Kodak HIE/HSI works quite well with a simple
#25 red filter.
Attaching Filters
After you have chosen the appropriate filter type, you have to decide
about how to attach it.
There are three popular alternative ways to go:
Front Lens Mount
Attach the filter by screwing it in the front mount or inserting it
in a holder such as Cokin's or Lee's. The filter may be made of coated
glass, or uncoated gelatin, resin, and polyester.
Rear Lens Mount
In some cases, it's not possible to use the filters in front of the
lens, e.g. for fisheye lenses or medium format lenses with huge screw-in
mounts (my Carl Zeiss Jena lenses use 86 resp. 95mm filters!).
Some of these lenses have special rear mounts, but with the exception of
a plain red filter, there are hardly any IR filters available in these
mounts. The solution is to simply tape a gelatin or polyester foil
behind the rear element of the lens.
BTFR (Between The Film Rails)
Attach the filter with a little help of adhesive tape between the
film rails behind the shutter or, as a more difficult alternative, in
front of the shutter but still behind the mirror if you're using a SLR.
In this case, the filter has to be made of thin gel or polyester. The
details depend on your specific camera body. Pay attention that it
doesn't touch the film or gets into the delicate shutter mechanics!
BTFR works perfectly for action photography, especially when using
opaque filters. Here's a summary of pros and cons:
Advantages of BTFR:
bright viewfinder, even when using opaque filters for SLRs, so no
need to take off the filter for composing and focusing and to put it
back on for the exposure one filter for all lenses, even super-wide,
fisheye, long tele, etc. no need to change the filter when changing lenses
no risk to forget mounting the appropriate filter Disadvantages of BTFR:
awkward installation and removal of the filter if you can't dedicate
a body for this purpose filter is fixed for at least one film (assuming that you put the
filter in the body and don't have changeable magazines) dust, fluff, scratches and similar flaws on the filter are in focus
and cast more or less sharp silhouettes on the film (depending on the
distance between film and filter and the lens' focal length as well as
f-stop) reflections between film and non-coated filter may reduce optical
quality
Kaynak
pauck.de/marco/photo/infrared/filter/filter.html